DIY Vibraphone
Want to Build Your Own Marimbas, Xylophones & Vibraphones? Percussion instruments are essential to many styles of music, and fortunately for the novice or the musically inclined child, they are relatively easy to get started with.
The great thing about these projects is that they will work for you, no matter what wood you have available – or in the case of the vibraphone and glockenspiel, they will work well with standard metal stock, which is inexpensive and easy to get hold of in most parts of the world.
Recommended Product: Building Your Own Marimbas, Xylophones & Vibraphones is Easy & Fun – and You are Saving Heaps of Cash!
If you don’t want to invest the money in real percussion instruments just yet, the guide below will help you make percussion instruments with household items.
These inexpensive projects are great for helping young children to discover music. Adults can also use these instruments to add cheap, improvised percussive sounds to their recordings or performances.
Concert-quality marimbas are usually made from Honduras Rosewood or African padauk, and the better wood you have access to, the better instrument you’ll be able to make. However, you can make these instruments from just about any hardwood.
Costs incurred
Depending on the quality of the materials you choose to use, you will find that the costs of making it can vary.
This depends on which instruments you are building and also on where you live. These instruments are designed to use inexpensive materials commonly available in your average hardware store.
So below is a rough guideline of the costs to expect if you want to build a percussion instrument. Without wasting much time, here is a rough guide to materials costs for the various instruments.
- Simple Glockenspiel – $20
- P1 Xylophone – $33
- P2 Mini-Marimba – $250
- P3 Marimba – $400
- P524 Marimba – $1700 (for full five octave version using African Padauk bars)
- PV Vibraphone – $600
Remember that if you wish to make a better quality instrument, you can invest in better quality wood, such as Rosewood. This will cost you a few hundred dollars but will still be less than purchasing a real concert instrument.
The Plan
When making a decent and reliable plan, it is always best to include measurements to know exactly what you’re doing and how you are doing it.
You don’t necessarily have to be great at woodworking to make these instruments. However, with your level of experience, the quality will be different. When building a DIY marimba at home with making marimba plans, most of the skills required are basic woodwork measuring, cutting, and sanding.
Even if you’ve hardly ever picked up a hammer or a saw in your life, just be confident that you’ll be able to achieve a workable instrument using these plans. The tools you will need to make a marimba are common household tools. Things like:
- An electric drill with a sanding attachment
- A screwdriver
- A wood saw
- A small hammer
- Sandpaper and sanding discs
- Hacksaw
- Rivet Gun
- Plus, a few other bits and pieces commonly found around the garage
The guide: Perfecting your instrument
Tuning a xylophone bar
Getting a tuner for your instrument will make the whole tuning process easier. If you get a commercial tuner, the better your tuning, the better your instrument will sound. It is possible to tune a marimba purely by ear, but at least a basic electronic tuner is highly recommended.
Any chromatic tuner will do the job, and you can get a basic electronic tuner from any music store for around $50 or borrow one from a friend to get the job done.
These tuners are incredibly common. Nearly all professional musicians or music teachers either own one or have a friend who owns one. If you want to make life even easier and get a fully professional tuning result, Peterson makes tuning software you can buy online for less than $100, which is preferable.
Homemade vs Commercial
Don’t be worried if your instrument will sound as good as the ones you can buy in a shop. However, if you save extra money by using cheaper timber for the bars, you can’t expect them to sound like one of the traditional timbers used for marimbas. Also, the final sound will depend on the care and precision with which you make and tune your bars.
Does it matter what the resonators are made out of?
The simple answer is no; it does not matter. This is one of the biggest areas of misunderstanding for most people. Making the vibraphone resonators and tuning the resonators.
The fact is that it makes very little difference. Commercial instrument manufacturers will often talk about the sounds of different resonator materials mostly because they want to make their instruments seem more special.
The resonator’s job is to amplify the sound, and it does this by containing a column of air which is the correct size to resonate when sound waves from the bar enter it. So, does the column of air care what is containing it? Or does it even know? Remember, it’s the column of air vibrating, not the container, so what it’s made from really makes very little difference!
Extra hard metals only make a difference at quite high frequencies. In which the frequencies are way above the range of the vibraphone. Only the upper harmonics of the vibraphone are in this frequency range, and these upper harmonics are tuned to not resonate in the tubes.
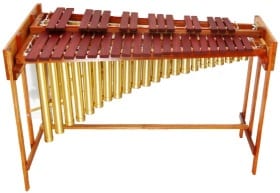
Make your own marimbas
The plans included for this instrument use PVC pipe for the resonators because:
- They are lightweight
- They are inexpensive
- They are easy to work with
- They don’t require heavy-duty hardware to hold them in place.
Besides, you can get PVC pipe at just about any hardware store, as it is usually used for drain pipes around just about any home. Of course, nothing stops you if you want to use different materials for your resonators. The building guide still tells you how to get your desired result.
1.Selecting Your Materials
Honduran Rosewood is the most favored choice for bar fabrication, although other hardwoods, such as cardinal wood or purpleheart hardwood, will provide suitable, less expensive alternatives for this first project.
Gather a collection of scrap hardwoods and tap on them to evaluate their initial tone. Listen for the brightness or darkness of tone, how fast the hardwood responds, and most importantly, its ability to sustain a tone.
2.Cutting the Blanks
The bar dimensions provided here are for building a xylophone with a range extending from C4-A5. All bars should be cut 1 3/16″ wide by 5/8″ thick. Bar lengths are as follows:
C: 10 1/4″ D: 9 7/8″ E: 9 3/4″ F: 9 5/16″ G: 9″ A: 8 5/8″ B: 8 5/16″ C: 8 1/16″ D: 7 3/4″ E: 7 7/16″ F: 7 1/16″ G: 6 13/16 A: 6 716″
3.Finding the Nodal Points
The nodal point for the fundamental pitch is the point at which the bar should be drilled for a positioning rod. The nodal point is 22.4% from the end of the bar before it is undercut. With the undercut made, it is, in a sense, lengthened. Therefore, the accurate placement of the drilled hole will need to be a little closer to the end of the bar.
4.Cutting the Arch
With the fundamental nodal points calculated and the hole for the positioning post drilled, the arch can now be cut. Begin by sketching the arch on the side of each bar, with the ends of the arch ending slightly before the nodal points at each end of the bar. Xylophone bars have a shallow arch. The illustration below should serve as a model for effectively shaping each bar’s arch.
5.Tuning the Bar
The initial shaping of the underside of the bar can be managed with a bandsaw. The rest of the undercut shaping is best left to a power sander. Keep in mind as you are fine-tuning the bar that the fundamental pitch is most affected by removing wood in the middle of the arch.
If, in fine-tuning the fundamental pitch, you remove too much wood, which drops the pitch past the desired frequency, and a little off both ends of the bar. This procedure will keep the bar balanced and able to respond with a consistent vibration throughout the bar.
6.Finishing the Bar
A light coat of lacquer will give your bars a finished look.
Building the Resonator Box
Materials List
- Hardwood, Pine or Plywood
- Elmers Yellow Wood Glue
- 13 – 2″ Slotted Brass Round Head Bolts
- 14 – 1 1/4′ Allen Set Screws
- 14 – Black Plastic Screw Covers
- 2′ – Black Rubber Vacuum Tubing
- 12′ – Soft Cotton Cord
Final Thoughts
Congratulations; by now, you should be looking at an amazing homemade marimba instrument right before you. Have fun playing it and enjoy making music.