
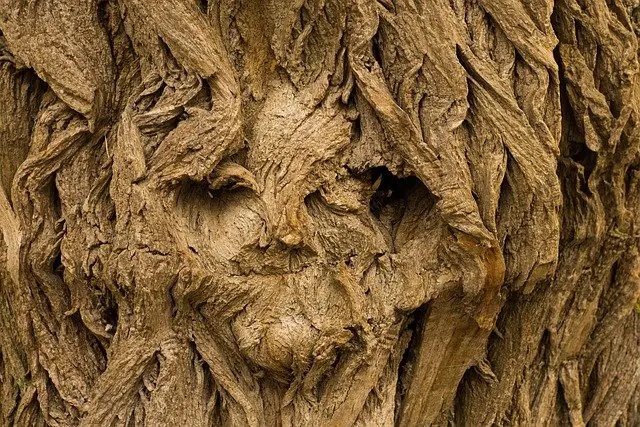
Whittling eyes in wood spirits
Carving eyes in wood spirits is also known as “spirit carving.” This type of carving is commonly seen on historic buildings in Europe, where it represents the face of the people who lived in the building. Spirit carvers carve the eyes, nose, and mouth of the person in the building. Carving eyes in wood spirits is one of the most interesting woodworking projects you can undertake, and it’s also one of the easiest. If you’re new to carving, you can get started immediately with the simple eyes shown in the steps below.
What you need to carve eyes
- Paint
- Carving knife
- V-tool
Safety
Wear Safety Gloves
Safety gloves protect your hands from operating the tool. It does not matter which woodwork tool is being used, be it a saw or a knife. When working with power tools like a knife, gloves save your fingers. Look for the gloves on Amazon, and I am sure you will find the best.
However, gloves can be disturbing, and you can make the finger guard an alternative. They are for your fingertips and help you avoid cuts to your thumb and fingers. When using your thumb as a pivot, a thumb grip gives you protection.
Eye protection
Power tools make flying dust that comes up in your face. Protect your sensitive areas from it. And sawdust is an irritant for the eyes, and it causes itching, irritation, pain, and sometimes bleeding. Protect your eyes by wearing goggles. Safety glasses and goggles cover areas that are prone to be affected by dust.
Use Sharp Tools
Using sharp tools increases the chances of having precise cuts. As sharp objects are dangerous, using sharp objects in woodcarving is safer than blunt tones since they are harmful. A dull knife makes cuts unbearable, and the tool does not allow you to experience slips and unwanted cuts.
Wear Ear Plugs In Case of Power Tools
Hand tools are quiet and make noise when you want them to, unlike power tools. You cannot avoid noise, and you can only stop it from affecting your ears by wearing earplugs, and you can’t help it. They make noise due to the motors that power them and run at ultra-high speeds of tens of thousands of RPMs.
How to start
- Learn to handle your knife correctly—the. It has to be comfortable to hold and appropriate for your project.
- Use carving gloves and some protective wear to protect yourself from your sharp tools.
- Carve wood by following its grain.
- Draft your design on paper and transfer it to your wood material.
How to get the eyes to look realistic

Establish the blueprint using a dry brush. Draw a trapezoid into which you can build the eye socket. Make the color look like burnt lumber, and the color establishes the footprint where you will build the flat planes. Paint a circle inside the eyeball. In the center of this circle, draw two concentric circles that look like the bulls-eye of a target.
Add darks
Place a small arrow as a reminder of the direction of light and make a thin, dark mixture of burnt sienna and ivory black to drybrush inside the eye socket and on the shadow side of the eyeball.
Place mid-values
Fill the pupil with ivory black and place a thin mixture of cobalt blue with a touch of ivory black in the iris. The colored part of the geomis represented by the middle circle. Mix yellow ochre and alizarin crimson into the dark mixture as you add a little white.
Place a triangle of this mid-value skin-tone mixture on the shadow side of the eye on the upper and lower lids. Make the mixture light white and place two triangles on the upper and lower lids on the light side.
Start blending skin and add eyebrows
Make a realistic skin tone for the more lighted areas using yellow ochre, alizarin crimson, a bit of ivory black, and white to the mid-value mixture. Add new planes to the areas around the eye and add the eyebrow with ivory black, burnt sienna, and yellow ochre. Make the eyebrows grow using brisk strokes.
Blend and soften the eye
Add warmth to the inner and outer corners of the eye and soften the depth of the darkest shadows.
Add highlights
Add highlights to the brow bone, the upper lid, the lower lid, and the cheekbone. Use pure white on the catchlight placed between the iris and the pupil. Soften the transitions, feather out edges and reduce the depth of shadow in the socket. Adjust highlights, blend along the brow bone, and round out the shadowy depths.
How do you power carve your eyes?
Get your power carver started and make a proper structure. Imagine how your eye should look and make the structure. Imagine the eye involving a ball in a hole covered with skin. Close your eyes, feel its wood structure, and start to recreate it.
How do you cut an eye out of wood?
When you are struggling with carving wood spirit eyes, paint the eyes on their carvings. The process requires painting the whole carving. The shape of the eye is subject to change depending on the emotion you want to portray. Use the four V-tool cuts to shape the eye.
These are the same cuts regardless of the type of eye you are making. It can be an angry or happy eye. What determines the expression is the shape or placement of the cuts.
How to carve eyes in wood: Steps
- Round the corner of the blank using a carving knife. Faces and eyes are not flat, so you have to start with a rounded blank.
- Make a semi-circular stop cut with the carving knife as you outline the brow line. Cut deeper at the rounded corner, and make a shallow cut as you get to the sides. When you want to make the eye socket, carve it up to the stop cut. For a deep eye socket, repeat the process.
- Rough in the eyeball, remove a triangular chip of wood from the inside and outside corners of the eye with a carving knife. That helps you begin to round the eyeball.
- Carve the upper eyelid and make the first V-tool cut along the inside crease of the top eyelid. The model used is a sharp 1/8″ (3mm) V-tool. That way, you will separate the upper eyelid from the eye socket and the brow line.
- Shift to the lower eyelid as you start carving. Use the same V-tool to make the second V-tool cut. That is along the inside crease of the bottom eyelid. The operation separates the lower eyelid from the bottom of the eye socket and the top of the cheek.
- Refine the upper eyelid and make the third V-tool cut along the bottom edge of the top eyelid. Move the wing of the V-tool perpendicular to the eyeball to separate the upper eyelid from the eyeball.
- Make your final touches on the eyelids. Use a detail knife to make a stop cut along the bottom of the upper eyelid to separate it from the eyeball. Continue using the knife to thin the lower eyelid. The upper eyelid overlaps the lower eyelid at the outside corner.
- Round the eyeball and make a stop cut along the top of the bottom eyelid with a detail knife. Cut up to the stop cut using the same knife along the upper eyelid. Go down to the stop cut along the lower eyelid, rounding the eyeball into stop cuts.
- Choose amongst your options how you want to finish the eye. The upper eyelid should stick out more than the lower eyelid. Paint the carving if you wish to, and you are done. Carve the iris and pupil if you want to apply a natural finish.
- Get ready to carve the iris using a 1/16″ (2mm) #6 gouge to make a stop cut around the iris. The eyelids hide a part of the iris, and that does not happen if you are making a surprised or scared expression. Make a little shadow and clean up the iris with a detail knife and micro gouge.
- Carve the pupil and stab in the pupil with a micro veiner. The pupil shows under the upper eyelid. Carve out the pupil using a micro veiner and clean up the pupil with a detailed knife. That creates a deep shadow.

- Grain and Sheen: Teak Oil versus Danish Oil Uncovered - January 10, 2024
- The Cherry on Top: Crafting the Perfect Cutting Board - January 9, 2024
- Polyurethane Water-Based vs Oil-Based: Choosing the Right Finish - January 8, 2024