Are you wondering how to repair a cracked wood carving? Growing up, my mother always had a few arts and crafts projects. With each phase, we had to understand what not to throw away or break.
Otherwise, you would throw away a stack of paper only to hear that it is for a new project. You’ll also find some wooden artefacts and wood carvings among her projects. My adventurous self found a way to knock one of them over and crack it to get to the point.
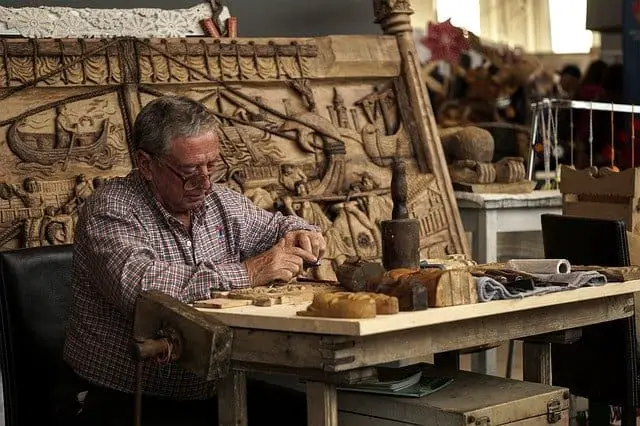
I got into a lot of trouble that day. Her almost-finished carving was ruined. After I failed to fix it with two superglue tubes, she found out and did a horrible job. I wished I had a way back then to know how to fix it seamlessly. I eventually found out how to do this, and in this article, I will share some handy tips on repairing a cracked wood carving. Let’s dive in, shall we?
List of things that you may need to use:
Depending on the crack you want to improve and how large the surface area is, you will need to fix a cracked wood carving. It will also depend on how handy you are with some of the tools we are about to list. Here’s what you will need for small cracks:
- Polyurethane glue is like Gorilla glue or any wood glue that can hold two pieces of wood together.
- Water to activate the glue.
- An angle grinder Or a sharp knife
- Cedar shim, or any other shims to repair the crack that can match the wood as much as possible. You can either make these yourself or buy them.
- A chop saw or chainsaw.
- A finger sander or any versatile sanding tool
- A hammer
- Paint or stain that matches the carving
- A buffer
- Sandpaper
- Personal protective gear such as gloves and goggles.
- Epoxy wood rebuilder.
- Putty knife
- Painters tape
- A soft dry cloth
These simple tools will help you seal the crack.
Step By Step Process.
There are different ways to fix a crack in the wood. Different strokes for other folks. We will go through the different ways you can do this.
Method 1
What you will need
- An angle grinder
- Cedar shim
- A strong wood glue
How to do it
- Ensure the carving is clean. Sand it if need be so that the glue doesn’t get mixed with dirt or dust and perhaps fails to stick correctly.
- Choose shims that match the wood’s shade, especially if you will not be painting over it. If you will, the wood type or colour won’t matter much.
- Ensure the shim fits in the crack. This may need you to try out more than a couple.
- Take the shim, whether bought or homemade and put a generous amount of wood glue on it.
- Then place the shims in the cracks and ensure they fit well, leaving no gaps; otherwise, it utterly defeats the purpose of sealing the crack.
- Knock the shim in using the hammer
- Let it dry. Some glues require that you spray the area with water so that it activates.
- When you are sure it is dry, use the angled grinder to shave off the excess shim hanging off. Make sure that it is deep enough. The point is to get the shim fully immersed in the crack and not outside of it.
- If you’re happy with what you have, smooth the surface with a finger grinder or any grinding tool that suits the surface.
Method 2
What you will need
- Wood epoxy
- A putty knife
How to do it
- Get wood epoxy that matches the colour of your wood.
- Stuff the epoxy putty into the crack.
- Buff it out
- Paint over the area uses the necessary wood stain to blend in with the rest of the carving.
Method 3
What you will need
- Glue
- Painters tape
- A vacuum
How do you do it?
- Clean the carving in question and as much of the crack as possible
- Make sure the glue is at room temperature.
- Stick the painting tape over the crack
- Have your vacuum ready and placed under the crack
- Lift the tape off the crack, covering only the edge. This will stop the glue from seeping out the side when it is poured in.
- Pour the glue into the crack as the vacuum sucks the glue through the crack.
- When you are satisfied that enough glue has been sucked in, you can now wipe the surface clean and then dry the area.
- Once it is dry, you can remove the remainder of the painting tape.
Method4
If you want to fill cracks in much smaller carvings, such as caricatures, you will need less bulky materials so that shims won’t work. What you will need;
- Fine sawdust that looks like flour
- Wood glue
How you do it
- Identify all the cracks you need to fix.
- Please ensure they are wide enough to accommodate the glue and sawdust mixture. You can use a small chisel for this.
- Then dip the chisel in the glue and the sawdust, forming a paste.
- Push the past into the cracks and make sure that it flows over a bit
- Make sure the glue you use gives you time before it starts to dry up. White pasty glue works well.
- This paste will act as a wood filler. Fill the cracks and wait for it to dry.
- You can then sand the area down when it is dry.
- Clean the area around the cracks.
How Long it will take

The amount of time it takes to seal and repair a crack in a wooden carving will depend on the method you choose and the carving size in question. The more glue used, the longer it will take to dry. Some glue can take 30 minutes to dry, and some even more. Have patience and follow the instructions from the manufacturer.
Expected Results
- Using the correct method properly will give you a smooth finish and hardly noticeable results. However, the processes that involve pouring in glue or epoxy may need more attention to ensure that the crack is filled in well.
- Preparing for the crack to get deeper or for the carving breaking even more, is also essential. This would be a worst-case scenario.
- The third outcome you could expect is where the crack is filled but not neatly. This got me caught when I broke my mother’s wood carving, a shoddy job with too much glue that I didn’t know how to use.
- Using a wood filler can show through the wood stain and look horrible, so consider the end product when choosing your repair method.
Things to look out for when doing cracked wood repair
- Ensure that you do not try to clean the surface with water and that the cloth you use to clean the carving is soft and dry.
- Be sure to give the carving a decent finish. Sometimes it can have a rough surface if it is not finished off correctly, which may end up as a focal point rather than an inconspicuous bit. You will need to make sure that it is as level as possible. Sand it down to ensure you can hardly tell where the repairs were made.
- Match the colours. If you have a more natural colour wood that isn’t stained or painted, you may want to use wood epoxy or wood fillers. It is easier to get matching colours than with a shim. Also, ensure that you have the right paint or stain colour to provide a uniform look when all is said and done.
- The strength of the wood surrounding the repaired part may differ from the glued area. In most cases, the glued part is stronger than the surrounding areas. As such, you may end up with a carving with varying strength.
- Also, if you use shims, it helps to have someone else stabilise the piece of wood. This way, you don’t have the shim drying skewed.
- Remove all excess glue properly after you have finished applying it and it has dried. You want the finish to be smooth and easily blend in with the rest of the wood carving.
Conclusion
Whether you need a complicated repair or something small, there is a right and a wrong way to repair a wood carving. It all depends on your method, the tools you have on hand, and the type of wood you are working with. Regardless of the scale of the job, you want it to be done well. Moisture content is another aspect to think about. Cracks are often associated with it, as well as the drying process. Exposure to heat and cold takes its toll.
Let’s face it, wood cracks; that’s just what it does. We hope this article helps you decide which method is best for you.

- Grain and Sheen: Teak Oil versus Danish Oil Uncovered - January 10, 2024
- The Cherry on Top: Crafting the Perfect Cutting Board - January 9, 2024
- Polyurethane Water-Based vs Oil-Based: Choosing the Right Finish - January 8, 2024
