How to carve a wooden whistle
No matter your level of skill or the number of projects you have under your belt, carving a whistle is relatively easy. It is not all that different from using other power tools like an electric or manual drill. All you need is the proper hardware, which can be purchased for under $10 from any hardware store, and some wood. The best part is that you can do it with a carving knife or some power tools.
What You’ll Need:
- Carving and finishing tool (sander or sandpaper) to smooth edges and round the whistle once finished. A knife or ax (or both) to carve it.
- A woodblock that is soft enough for carving.
- Vice to help hold the wood in place, but it can be omitted if you’re careful.
The Process
First, get some wood. The best type of wood to use is soft and easy to carve, like pine. See our post on the best wood for carving.
Prepare the wood
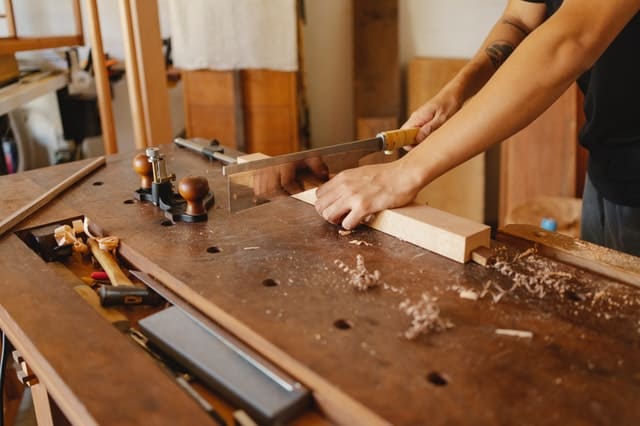
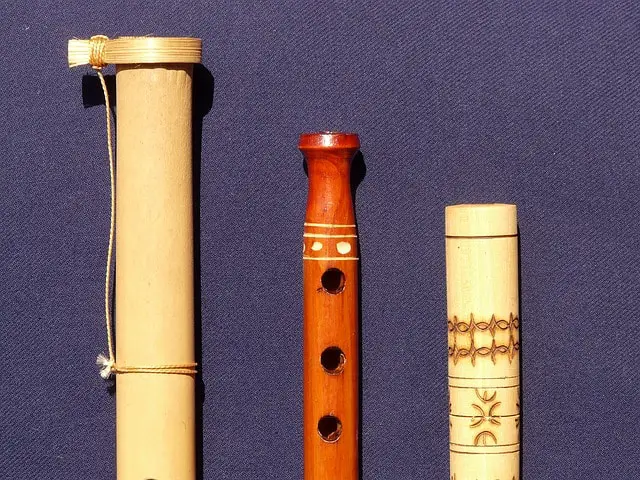
For the first part of this process, you can follow the above pictures as a guide to making your wooden whistle. Using a knife or ax (or both), start carving into the woodblock in any way your heart desires. A word of caution: Be sure that you’re using a relatively soft type of wood for this step and that all of your cuts are made with a downward motion.
Secure Your Block
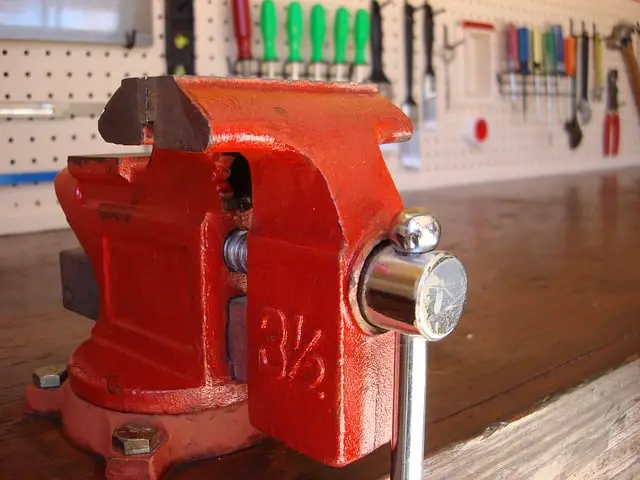
Once you’ve finished your block, get it into the vice. The vice is optional but very helpful if you want to be 100% safe and sure your block is secure while carving. Using rounded hardwood like maple or cherry can help provide a better grip on the block and will assist in creating a more uniform hole over the length of the whistle (as opposed to making deep, uneven cuts).
Managing Time
After you set everything up, carve the block until the whistle begins to take shape. Make sure to cut for 10–15 minutes before taking a short break. This will ensure you don’t over-exert yourself and hurt your hands or fingers. Try not to use too much pressure with the knife or ax; let the tool do most of the work as necessary.
Shaping the Block
Now that you have completed carving, it is time to finish your whistle. Try to follow the shape of the block you carved with your knife or ax, but use a smooth motion to create a finished whistle. Remember to do one side before moving on to the other.
Sanding it down
After you are done, rub it down with sandpaper and polish it as necessary, being careful not to glue or otherwise seal the woodblock to ensure that you get a clean whistle. If you use too much sealant, your whistle will be tough and shiny instead of soft and toothpick-like. That’s not what we want.
Sometimes people carve whistles with a diamond file, which is an excellent method to rough out a whistle quickly. This is especially useful if you are working from a larger wood block.
Decorating it
When the whistle is finished, decorate it however you see fit. You can add some extra details to your whistle or make it straight-up plain with no decorations. A lot of people will paint their whistles. Some paint their creations, but some prefer to keep the original look of a woodblock and let it naturally fade over time. The leather dye can provide an excellent way to color a wood block in two or three colors.

If you are a lover of art and music, then you owe it to yourself to try a whistle. Whistles are fantastic pieces of art that truly allow you to customize your unique instrument. They’re cheap, easy to make, and pretty darn easy on your hands when carving up wood blocks with a knife or ax. You’ll have a fantastic instrument you can play for your friends and family or sell on eBay or Etsy, and making them is a lot of fun too.
Which wood should I use to carve a whistle?
For a carved wood whistle, the wood should be pretty soft so that it carves easily. This ensures that your hands will not be injured while carving out your whistle.
Is cherry hardwood best for carving a whistle?
Cherry is not the best wood for carving a whistle. You can use it, but it’s very hard and will require a lot of cutting and sanding to achieve the proper shape and smoothness to play a good tune.
Is maple hardwood best for carving a whistle?
Maple is also not the best wood for making a carved wood whistle. It also takes a lot of effort to carve to get the desired shape and smoothness. However, if you are looking for something challenging, then it would be ideal.
Is pine good wood for carving a whistle?
Pine is an excellent choice for carving out your whistle. It’s very soft, so it will carve very quickly and requires practically no sanding to achieve superb smoothness for whistles.
Are there other types of wood that I can use to carve a whistle?
Many types of wood can be used to create a whistle. However, if you are looking for one that is easy on your hands, you should stick with pine. There are a lot of other woods that can be used, but you should take a little care before deciding to use them to carve out your whistle.
How do I sand the whistle down?
It would help if you sanded down your whistle for a few hours once it’s finished and ready to play. You can use a hand tool like sandpaper or an orbital sander to accomplish this task, or you can hand-sanding if you’d prefer.
How do I make an end-plug for a whistle?
Making an end plug for your whistle is simple and can be done in several ways. The most common way would be to drill a hole at the bottom of your whistle, make sure it’s big enough to carry sound into the wood, and then slide in the cork. However, there are other methods to accomplish this task as well.
Would you recommend making a willow whistle?
Willow is an excellent option for making a whistle. There are so many ways to make willow into a whistle, and it can be used in many different ways. You can follow through with many designs, and because it’s relatively light and doesn’t take much effort, it makes the carving process fun for beginners.
How do I attach my whistle to the neck of my instrument?
Whistles are attached using a lacing cord made of nylon or some other synthetic material. The cord is substantial and works well to hold the whistle to your mouth. You can tie it into a knot or use a particular self-locking device known as a lanyard lock.
How do you attach a whistle?
There are many ways to attach a whistle. If you’re looking for one specifically designed to be used on instruments, then it will have some locking mechanism that you can use to secure it in place.
How do I clean my whistle?
To clean your whistle, you can use a dishwasher and put it on the top rack, or you can use white vinegar and baking soda to make a paste to rub over your whistle with some steel wool. You can also soak it in water for a short period. It would help if you cleaned your whistle about once or twice a month, depending on how often you use it.
Can I use a dowel when making a whistle?
Yes, you can use a dowel to make a whistle. You will need to use a flat drill bit so that the hole is the same width as your dowel, so your whistle becomes symmetrical. You can also use sandpaper to smooth out any rough sides.
Is there a way to make my whistle louder?
Yes, you can make your whistle louder by putting it in a wooden box and wrapping it in felt or wool. This will make your whistle louder, but if you use this technique for too long, it will flatten out the pitch of your whistle.
How long can I expect my carved whistle to last?
This is tricky because it depends on your exact tooling and the material used. If you use the correct tooling with high-quality material, your whistle should last as long as any other carving: a few years, decades or a lifetime in some cases. If you make a wooden whistle with less than .010″ remaining thickness, it will begin to break down about four years after being carved. I would recommend taking your whistle in for an annual tune-up to ensure it works properly.
Video Resources
Books Resources

- Grain and Sheen: Teak Oil versus Danish Oil Uncovered - January 10, 2024
- The Cherry on Top: Crafting the Perfect Cutting Board - January 9, 2024
- Polyurethane Water-Based vs Oil-Based: Choosing the Right Finish - January 8, 2024
