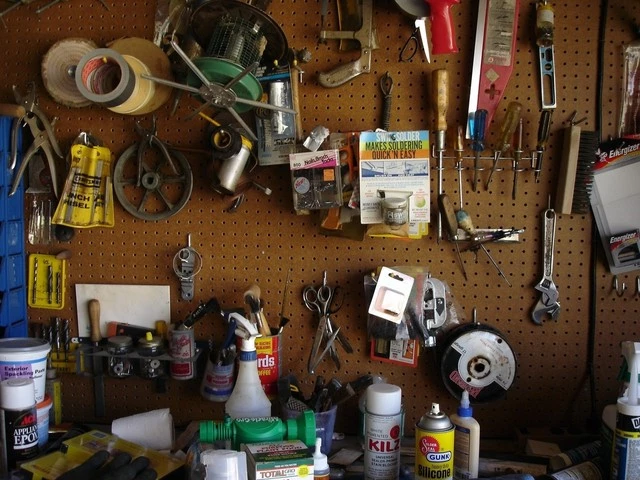
How to mount pegboard
A pegboard is a strong and hardboard used to keep your tools. It requires detailed measuring, leveling, and wall support. Installing the board is an affordable project that takes time and patience.
Install several pegboard sections along your wall. The pegboard is sold in two-by-four, four-by-four, and four-by-eight-foot pieces. It is up to you to choose the smaller or more prominent option. Ask the shop attendant to cut it to your size if you want it smaller. Expect to get the service for free or at a fee.
Tools and Materials
- Drill.
- Screws.
- Pegboard.
- Peg hooks.
- Tape measure.
- Table saw.
- Pegboard hangers.
Measure the board
Make pegboard walls in three strips at the top and bottom. Use a ¼ inch pegboard as you attach the straps with washer-head screws. Attach screws on the hooks to the wall. That allows the pegboard to accommodate heavy items like bikes.
Measure the width and height of the area where you plan to hang the pegboard. Calculate the number of furling straps you need. Space them after every 16 inches. Cut the number of strips required. The measurements should tally with the ones done on the wall.
Fasten the strips at every 16-inch stud. Secure and flush the strips to the surface. Pegboard has a standard measurement of 4 x 8 inches. If you have limited knowledge of pegboard sizes, you might use the above measurements.
Use a saw of your choice to trim the board to the dimensions of your choice. Screw the pegboard onto the furring strips. Screw one pegboard at a time if you install an expanse of pegboard. The frame gives you space between the wall and the board so that you have an allowance to connect hangers. The frame supports the pegboard and prevents damage to the wall.
Drill the holes
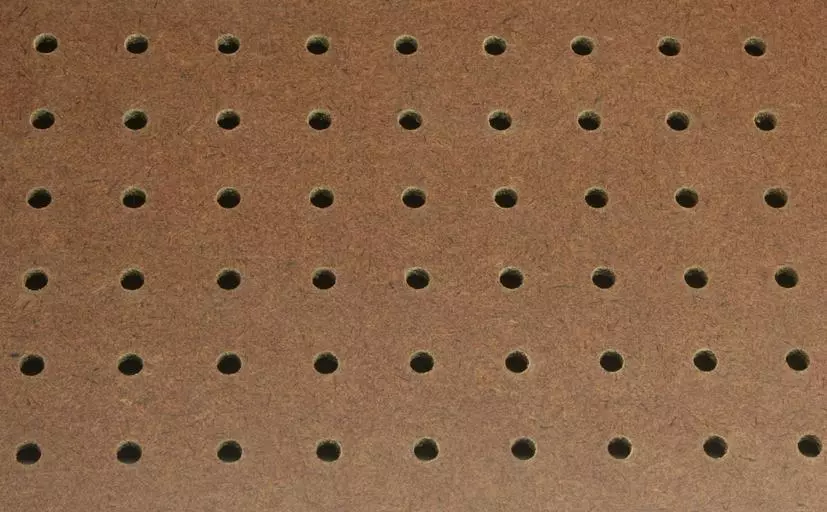
A pegboard comes with holes that have a spacing of 1 inch. The holes match ⅛ inch pegs, and the thickness is ideal for small projects. However, there are two thicknesses and two hole sizes. The small hole is ⅛ inch thick and 3/16 inch in diameter.
You are allowed to hang lightweight items. Use thicker boards for heavy tools and durability. Large holes are 1/4 inch in diameter. They accept 1/8-inch and ¼ inch hooks. Large holes are ideal for workshops and garages.
Mount the pegboard
As you start the process, use the stud finder to mark off your wall studs. When you cannot find the studs, hang the pegboard on the drywall. Install wall anchors every 16 inches for proper support. Drilling into studs allows you to turn heavy tools.
Take an extra hand when installing furring strips. Hold them horizontally across the wall and place a level on top. Your partner should hold the strip as you start drilling. It has to level up, and there is room for adjustments.
A small pegboard requires two horizontal furring strips. For large ones, three or four are enough. Drill through the furring strips as you make holes. Place the strips on the wall as soon as leveling is done.
Match the strip with the wall anchor. The pegboard has to cover framing strips. It has to be level as you get ready to mount it. Screw the pegboard into the furring strips at regular intervals. Secure the pegboard to the wall.
Layout the pegboard
Find an open stud bay and mount the pegboard up on the studs. If you are working on a wall, mount scrap wood onto the wall. Give the hooks enough space needed behind the pegboard. The scrap wood has to be mounted with support over the studs.
Apply hooks or other pegboard accessories to have space to hang your tools. These can be hangers, and they differ in size and design. Choose the type of hardware to attach. It has to accommodate any tool.
Set your work tools in place and look for the perfect configuration. Layout the tools you wish to hang on the pegboard. Try different arrangements so that you will not have to upgrade your pegboard in the future.
Customize the tools for accuracy. Outline each tool for correct placement. Mount the frame as you screw it onto the wall using plastic anchors and screws. Use a screw gun, washers, and 3/4-inch wood screws to mount a pegboard on the frame. Align out edges and space screws. If you do not have a screw gun, drill a hole and insert screws using a screwdriver.
How to Mark Holes on the Pegboard
Make a decision on the spacing of your holes and mark using a permanent marker. The markings are on the pegboard. Tap over the holes. Check the total width you calculate and the amount of spacing needed around the edges. A 6-inch gap between two holes is the standard.
How to Drill Holes in the Pegboard
Take a 5/8-inch drill bit and start drilling holes in the marked areas. Place the center of the bit over the marked areas and sand away splinters around the hole edges on both sides of the board. Use drill pressure to make sure you are drilling straight holes.
How to Sand the Pegboard
A pegboard is smooth, and minor sanding is required. Before you start sanding, use medium-grit sandpaper. Concentrate on the edges and corners of the panel since they take up the paint. Wear a face mask to protect yourself from sawdust and work in a well-ventilated area. Dust hinders a smooth and perfect finish when covered by paint. When your paint dries up, the dust particles start showing and leaving spots.
How to Assemble the Pegboard
Use a rail system for heavy loads; the rail should have holes on every inch. That helps it line up with the pegboard. Mount the rail track that comes with screws using two at each stud. When mounting furling straps, the wood screws should be long enough to reach the wall stud. Clip-on the rail cover. Since the hangers mount anywhere along the rail, you can still use the pegboard for smaller items. Make sure the pegboard has the same size as the frame.
How much space behind the pegboard
Determine the size and shape of your pegboard by checking the available wall space in your workspace. You are allowed to hang the pegboard over a workbench. Use a tape measure to make exact horizontal and vertical measurements for the size of the pegboard.
Most pegboards need wooden furring strips mounted on the back so that you leave a gap and the pegs or hooks will fit properly. The pegboard measurement determines the number of 1- x 2-in. furring strips you will need.
Assume one furring strip for each horizontal edge and every wall stud. These are usually 16 inches apart.
How to attach pegboard to the wall
- Use a stud finder or any other method to locate the drywall. Use a pencil to leave marks above where the pegboard will be. That is for alignment purposes.
- Use a level to ensure a 90-degree angle, holding the pegboard in place on the wall. You may need a partner to help.
- Drive screws through pegboard and furring strips at all four corners, aligned with the studs, to leave marks for pilot holes.
- Remove the screws and set them aside.
- Set the pegboard aside and insert drywall anchors in the holes.
- Drill 3-inch drywall screws through the pegboard and into the anchors, starting with the top corners.
- After the pegboard is secured to the wall, pull at the corners to test the connections. Tighten as needed.
How to hang a pegboard without wall damage
- Plan your pegboard as you determine which side of the pegboard you want it in front. Think of where to screw the bar on the pegboard. Screwing the bar near the top of the pegboard provides better support, and placing the spacers at the bottom keeps the pegboard at level with the wall.
- Prepare your pegboard using two screws to attach the bar to the pegboard. Use the other two screws to attach the spacers at the bottom of the pegboard.
- Before hanging the pegboard, wash and clean the wall with alcohol. That is how the command strips get bonded to the wall.
- Pick where you want to hang the top of the pegboard on the wall. At that place, apply the strip of painter’s tape on the wall.
- Take 16 strips of command strips, and make eight sets from them. Stick the sets of command strips together and spend 30 seconds on each stage of the command strip.
- Six sets from the eight command strips are for the bar, and the other two are for the spacers. Spacers are small. They need smaller command strips. Cut the command strips twice, about 1/3 of their length, one for each spacer.
- Apply six sets of command strips inline on the bar of the pegboard. Press each command strip for about 45 seconds into the board.
- Place the pegboard on the wall. Keep it pressed for some time.
- Takedown the pegboard from the wall and make sure that only one side of the command strip remains fastened to the wall. Press the command strips on the wall once again for 30 seconds each.
- Wait an hour after putting down the pegboard to allow the strips to adhere to the wall.
- After waiting for one hour, you can line up the bar directly on the command strips. Press it for 30 seconds each. Screw back the pegboard on the bar. Press the pegboard into the wall for some time and start using it.
How to install pegboard on concrete wall
- Place the board against the concrete wall at the place where you want to hang your pegboard. Take a level and place it on the top of the board to keep it straight. Take the drill machine and make holes according to the measurements.
- Put down the board and put the masonry wall anchors in the holes. Insert screws into the holes after placing the board between them. Make sure that the screws are tightened.
- Using a drill machine, take the measurements to hang the second board on the concrete wall. Leave a distance of at least one foot between all the holes. Use new holes or the old ones you made while hanging the first board. If using new holes, insert the masonry wall anchors again.
- Take the pegboard and place it on the concrete wall. Use wood screws to attach the pegboard to the wall. Tighten all the screws with a screwdriver. Repeat the same procedure to place the third board.
- Insert hooks in the pegboard depending on the need to hang different tools and pieces of equipment.
How to install pegboard in garage
- Build a frame of 2x2s with one running across the center.
- Connect all joints with a 3-inch drywall screw.
- Fasten ¼ inch pegboard to the frame.
- Align the 1×4 front edge so it’s 1/2 inch down from the shelf, and clamp it to the Peg-Board and frame. Set back the shelf with that 1/2-inch reveal. This 1/2-inch reveal strengthens the shelf. Predrill your screw holes with a 1/8-inch bit.
- Attach the end caps to secure the shelf to the frame and keep the front edge from tipping forward.
- Mount the pegboard low enough so you can easily reach your tools.
Using pegboard spacers
Install the spacers by running a long screw through the pegboard and spacer and into the wall. The screws must go into hollow-wall anchors or wall studs. For a better connection, use screw-in drywall anchors instead.
How to hang pegboard with spacers
- Cut the pegboard to size. Hold the pegboard against the wall in the desired location—Mark through the pegboard holes every 16 inches along all four edges of the pegboard. Trace inside the holes with a pencil—Mark on the pegboard next to each hole that you traced.
- Drill a hole at each mark. Use a hammer to tap an anchor into each hole until it is flush with the wall.
- Insert a screw with a washer into each marked hole on the pegboard. Fit a spacer onto each screw on the backside of the pegboard. Position the pegboard against the wall and drive each screw into its corresponding anchor.
Using pegboard hooks
Pegboard hooks will securely hold your stuff (Thespruce.com). Lock pegboard hooks in place. You need to have access to the back of your pegboard. Pegboard hooks have tiny barbs that lock into holes on both sides of the hook to keep them in place.
Using a pegboard mounting kit
Since minimal tools are needed, pegboard mounting accessories are easy to install and use. The pegboard mounting and spacer kit are applied to most standard sizes of pegboards, including 1/4 inch and 1/8 inch pegboards (thickness not exceeding 1/4 inch). The kit included pegboard hooks and shelves. These are organizing tools you can use in the garage (lowest.com).

- Grain and Sheen: Teak Oil versus Danish Oil Uncovered - January 10, 2024
- The Cherry on Top: Crafting the Perfect Cutting Board - January 9, 2024
- Polyurethane Water-Based vs Oil-Based: Choosing the Right Finish - January 8, 2024