I was recently asked How to protect pressure treated wood underground. Pressure treated wood is a great way to protect your wooded areas from plant roots and termites without the use of pesticides. It is also easy to handle and can be reused many times before the wood needs to be replaced. For this reason, pressure treated wood is widely used on construction sites to reduce costs and improve safety.
Considerations before you begin
Knowing the perfect wood for your underground project is of utmost importance. For outdoor projects, check the differences between Ground contact treated wood and lumber designed for above-ground use. That helps you avoid inappropriate use of timber.
There are factors you need to consider before use. Using lumber meant for above-ground for underground exposes it to areas covered by moisture. Treated wood for underground use needs treatment to increase the lifespan of your projects.
Treated wood should not be in contact with people and animals. There should be no chances in which the wood comes in contact with water sources such as lakes, streams, and groundwater.
There might be another less toxic alternative to use other than the pressure-treated wood. There are guidelines in using treated wood. If you are not sure, consult your local environmental protection agency. It gives you helpful instructions and information that leads you to the appropriate wood.
Be sure that the wood is suitable for underground
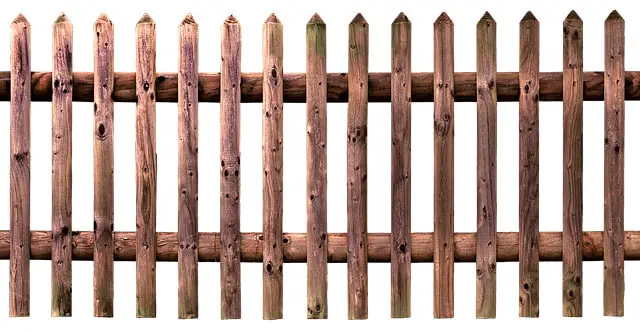
Protecting pressure-treated wood alone is not enough. Choose the perfect wood for use. Wood labeled marine buildings give you maximum protection from moisture. Research on pressure-treated wood so that you know what it is before purchase.
Pressure-treated wood is a softwood to fight rot, decay, and insects. The wood comes in a pressurized tank filled with preservatives that goes deep into the wood grains. That is how it becomes ideal for areas with moisture, such as the underground. Pressure-treated wood is not the same.
It differs in the level of resistance to rotting, chemical preservatives used and the types of chemicals used. There is wood labeled Above the ground, and it is used from the surface above, not from underground. The lumber labeled ‘Ground contact’ is for underground use. You are allowed to place it directly onto the ground.
Check the label or strength of your wood for the chemical retention level. That is a representation of the minimum amount of preservative retained in the wood. It is preserved per cubic foot of wood. The higher the number, the more resistant the wood is.
Benefits of treating the wood with an acid
Treating wood with acid modifies the wood. The reaction that follows when you add acid to wood involves molecules on the wood plant cell. The process brings improved wood properties that include stability and decay resistance.
Wood loses some of its volumes, and that results in weight reduction. Acid allows the wood cell walls to stretch, and that locks the wood in its original position. The wood becomes strong enough to carry high-volume materials.
The wood becomes more arduous, and that increases resistance to termites. When you treat wood with an acid, it becomes easy to work with. It accepts all the construction techniques. The use of stainless steel fasteners is better than regular steel since there are high chances of corrosion.
How Long Will Pressure Treated Wood Last Underground With No Further Treatment?
Failure to give pressure-treated wood additional treatment does not mean it will not last long. The treated wood lasts up to 50 years underground. That is way better than untreated wood. When you set your treated wood underground without any other finishing or sealant, natural elements start attacking the wood after ten years. That is why you are encouraged to apply an all-weather wood sealant.
Clean The Surface Before Painting or Staining
When you want to paint or stain pressure-treated wood, let it dry and wash off the surface. Dirt and dust weaken the wood paint and cause unevenness on the surface. Get rid of the moisture so that there is a bonding between the surface and the paint.
That looks untidy and does not last long. When the surface is clean and dry, you are free to apply the stain and a finisher. Follow the given instructions and give it the appropriate waiting period before use.
Pressure Treated Lumber Grades
Use the highest wood grade for underground projects for a long-lasting project. Pressure-treated wood comes in grades as it is labeled premium, number 1, 2, and 3. Knowing pressure-treated grades reduces the chances of having the treated wood damaged in a short period. Higher wood grades have fewer defects in splits and knots.
What separates the wood is the retention level. The marine grade seems to take the trophy in underground projects. It has preservatives that withstand salty water, and the retention levels are high. Each wood has its lumber grade attached to it. The wood grades represent the strength, quality, and appearance of the wood.
What Causes Pressure Treated Wood to Rot?
Moisture causes pressure-treated wood to rot. That is why the wood has to be separated from the soil using cement or concrete. The ground contains a percentage of moisture that transfers water to the wood.
Using concrete helps when the wood is forming the base or foundation underground. The concrete strengthens the underground base and stabilizes the base. There are fewer chances of moisture transfer. Placing stones and rocks between the soil and the wood serves the same purpose.
The difference lies in the rocks allowing a small percentage of moisture to escape through the rocks to the wood. However, the delay in moisture transfer increases the life of the wood underground. Another method is wrapping the wood in plastic before placing it underground.
Moisture is trapped inside the plastic, and the only way to escape is through the wood. Fungi causes rot to treated wood, and it stays in the wood and gradually affects the wood. It causes decay and deteriorates in the long run. You may also be interested in Alternatives To Pressure Treated Lumber For Raised Beds.
Does Pressure-Treated Wood Need to Be Sealed?
Pressure-treated wood needs a sealer to protect it from moisture. Liquid wood sealant extends the life of the wood underground. Coating the lumber using a water sealer prevents it from rot and termites. When applying the sealer, make use of a pump garden sprayer.
One coat is enough, and you apply it on dry lumber. The sealer has to soak into the lumber grain. Allow the sealer to dry for two hours between coats using a roller brush. More coats of the sealer are allowed. Be careful of the amount that the lumber withstands. The sealing procedure has to be done yearly.
Water protection is what the sealer delivers. Pressure-treated lumber is already safe from rot and attack from insects, but that does not stop it from warping, splitting, and developing mildew. Surrounding the treated wood underground with cement is another way of sealing it. It brings stability to the wood from insects.
An all-weather sealant is ideal for treated wood. A thick coating is perfect since you will not be able to re-coat the wood underground. An oil-based wood sealant protects the environment and people if there are possibilities of getting in contact with the wood. A limitation comes with oil-based sealants as it produces arsenic, copper, and other chemicals to people and the environment.
How to protect pressure treated post in ground
- Choose the right pressure treated wood.
There are different types of pressure treated wood available on the market, so it’s important to choose the right one for your needs. Be sure to check the label to see if the wood is rated for ground contact. This will ensure that it will be able to withstand the elements and won’t rot or decay over time.
2. Dig a hole that is twice the width of the pressure treated post.
When you’re ready to install the pressure treated post, be sure to dig a hole that is twice as wide as the post. This will give the post plenty of room to settle into the ground and will help it to stay in place.
3. Fill the hole with concrete.
Once the hole is dug, fill it with concrete. This will help to stabilize the post and keep it from moving around. Be sure to allow the concrete to cure for at least 24 hours before continuing.
4. Install the pressure treated post into the hole.
Carefully lower the pressure treated post into the hole and make sure that it is level. If the post is not level, the weight of the soil and the water will cause it to lean over time.
5. Fill the hole with dirt and compact it.
Once the post is in place, fill the hole with dirt and compact it. This will help to keep the post from moving around. Be sure to leave a few inches of the post above ground so that it can be easily seen.

- Grain and Sheen: Teak Oil versus Danish Oil Uncovered - January 10, 2024
- The Cherry on Top: Crafting the Perfect Cutting Board - January 9, 2024
- Polyurethane Water-Based vs Oil-Based: Choosing the Right Finish - January 8, 2024
