Are you wondering how to get rid of big wood chunks when carving? This is a common pastime for many people worldwide, including my uncle. After school, I used to help him out a lot in his workshop.
I suppose the prospect of creating something from a tree stump draws me in. but it was not without frustrations. Learning to remove big pieces of wood was part of the tasks that had to be done.
There are steps taken to remove large pieces of wood so that you move from a stump to an elegant carving with great detail. These are some of the things I saw my uncle do.
While I’m no expert at it, I did pick up a few tricks that help me whenever I want to make a carving. This article looks at the different ways to get big wood chunks out of the way. It applies to your advanced project and beginner woodcarving ones. Let’s dive in.
List of things that you may need to use:
As in any workshop, there are things that you will need to ensure that you have for work to move along nicely and smoothly. Let’s look at some of the things you may need. This isn’t a list of everything you will use. It’s a list of what you can choose from. Here is some equipment for wood that beginners and advanced wood workers can use:
- An angle grinder
- Angle grinder attachments
- Piano orbicut
- Bandsaw
- Drill press
- Chainsaw
- A chisel and mallet
- Foredom mini angle grinder attachment
- Carbide sleeves and cups with a flexible shaft
- An ax
- Chip carving knife
- U-gouge
- V-gouge
- Palm tools
- Spoon gouges
- Finger sander
With one of these options, you should be able to remove significant bits of wood. The tools you choose may also depend on whether you want to use hand or power tools.
Step By Step Process
Every wooden carving is a shape made out of a log or a big piece of wood. The objective is to get rid of the excess pieces of wood to come out with a more defined shape and the carving you want.

This method works especially if you are using hand tools that are not powered.
- The first step is to cut a piece from the wood that is the size of the object you want to carve, giving some leeway for mishaps. You can use the ax or chainsaw, depending on the size of the desired carving. The tools you use to remove the excess wood depend on the types of woods.
- Remove the bark if it is not yet already removed. You can use a knife for this or a chisel and mallet.
- Cutaway shavings in the direction away from your body. This helps you avoid injuring yourself.
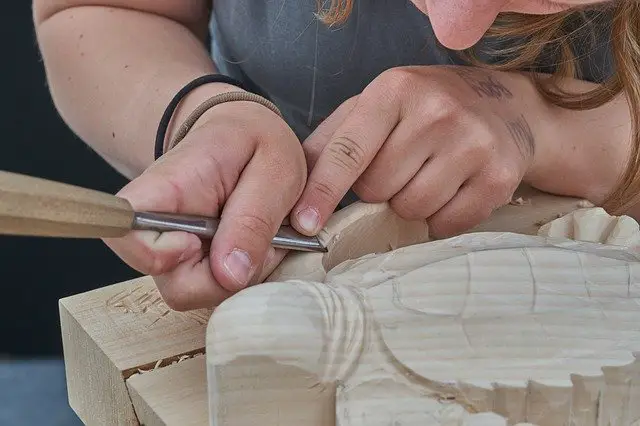
- Use a gouge knife to chip away the unwanted parts of the wood. Do this by knocking the knife’s point into the wood and then making another cut parallel to it so that the second cut slants towards the first and then remove the piece you need to remove.
- Use your mallet to knock the knife in and keep a loose grip.
- If you will be using power tools;
- Prepare the block of wood and make sure it is ready for carving
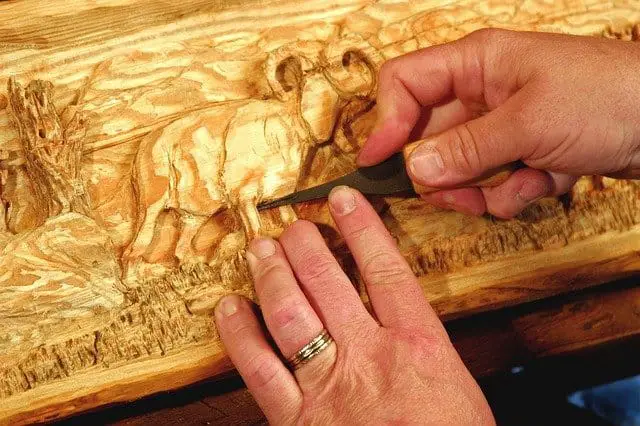
- If you like, you can outline the shape that you want to carve so that you can be more accurate in the way that you carve out the larger chunks of wood, then use the chainsaw to remove large chunks of wood, following the outline of your 2dimensional drawing, then leave some room for the finer details. When the basic shape is done, you can use the finger sander and whatever tool you desire to get the detailing you need.
How long it will take
The amount of time it will take to remove the excess wood will depend on the size of the carving you are working on. It will also depend on the type of wood. The harder it is, the longer it may take.
The time may also be extended depending on the tools that you use. Power tools are generally faster, but they are not always the best tools for the job, and sometimes you need to turn to hand tools, which may require more time.
Expected Results
The desired outcome is the wood carving you have on paper or the idea in mind. However, it is not what you always end up with. When dealing with wood carving, you can expect cracks in the wood. This isn’t a definite outcome, but it is something that you may want to prepare for.
It would help if you also were careful when using power tools for wood and knives. Follow safety precautions and keep yourself safe at all times. With knives and gouges, carve away from yourself. With power tools, follow the manufacturer’s safety precautions guides.
Things to look out for
Use wood that you are sure of. Some may have sap that you are allergic to, or you may react to the sawdust. As such, try to stick to wood that you have worked with before or at least whose side effects are known in your area, if there are any at all.
Conclusion
Wood carving can be a good way to earn an extra income, and doing it right makes you even better. To get to a level where your pieces make sense, you need the right tools and the right wood. One of the first steps to take when the carving is removing the excess wood is that you remain only with the wood you want to work with.
How well you get rid of clumps of wood when carving determines how much work you will need to detail. We hope this article helps you find the best way more suitable for your wood carving project. Happy wood carving, woodcarvers! You may also want to read our post on How to tell if a wood carving is going to split & How to join two pieces of wood for wood carving.

- Grain and Sheen: Teak Oil versus Danish Oil Uncovered - January 10, 2024
- The Cherry on Top: Crafting the Perfect Cutting Board - January 9, 2024
- Polyurethane Water-Based vs Oil-Based: Choosing the Right Finish - January 8, 2024