Are you starting your journey with wood burning? Try pyrography, the art of burning artwork into the wood. It’s amazing how much further and faster you’ll get when you start with simple woodburning projects rather than the more complex ones. As you build your skills and confidence, progress comes naturally. This post will recommend some wood burning projects for beginners. Make sure you have the best wood for wood burning.
What is wood burning?
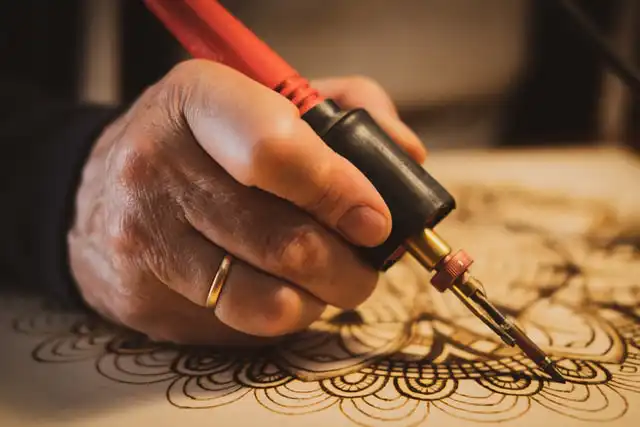
The art and craft of wood burning are also known as pyrography. It is a woodwork process that involves heated tools such as a soldering iron to etch designs on the surface of wood pieces. The tool makes all levels of art, from simple wood shapes to more advanced portraits, quotes, and drawings. The process is almost similar to drawing using a pen.
Tools Needed for Easy wood burning projects
- Wood burning tool
- Stencil
- Pliers
- Sandpaper
- Tracing paper
- Wood slices
Things to make
Serving Tray
Thinking of what to give as a wedding gift, a serving tray is an ideal new home gift or a thank you gift. It works in every home, and you are allowed to express your creative skills when making one.
Cooking Utensils
Cooking utensils include wooden spoons and spatulas, and there are multiple patterns for the DIY project. Smaller, more intricate repeated wood patterns would work great on kitchen utensils. Utensil holders make a good display with picture frames. Cooking utensils make quick and easy DIY gifts for any age group. They make a creative kitchen counter display. They are heat resistant, but that does not mean they will not burn.
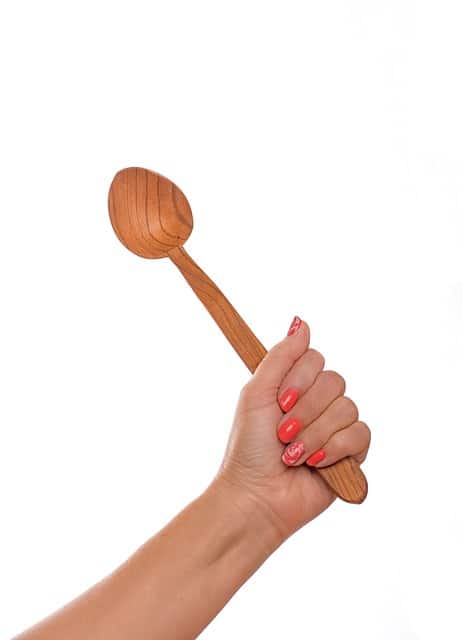
What determines the cost is quality, level of creativity, and cost material. Start making plain wooden spoons by sketching your desired design onto the spoon. You can have the wood design from the internet on your own. ,
Use stencils, stamps, and free-hand drawings since they work better for the small surface area of spoons and other utensils. Use a light hand to burn the outline of your pattern. Using letter pen tips to burn initials onto the surface takes seconds, and investing in pen tips gives you better-personalized designs.
Signs
Signs are used almost in all sectors, and they communicate with people by giving necessary information. The personalized custom carved routed wood signs are handcrafted signs and items that are easy to make.
It starts with a vision for the design, and the wording follows. Signs are not one-size fit. Each customer has different ideas and size requirements for the sign they want. Average sign sizes are 6″ x 24″ and 6″ x 18″. Many other sizes are available, and always check out some examples of our signs before you start making one.
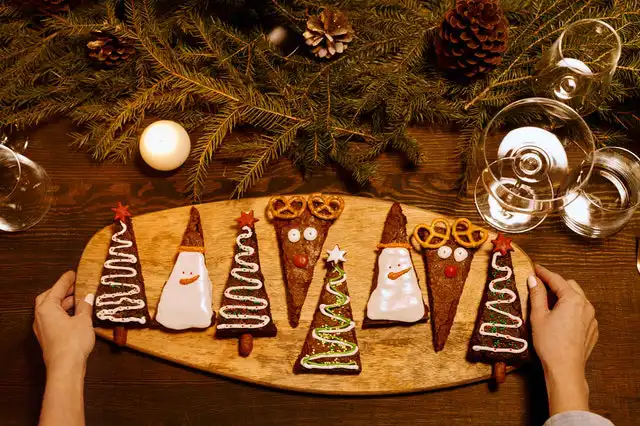
Wood Ornaments
Wood ornaments are for the holidays and year-round decorating, depending on what you choose to add to them. Adding one-word sentiments burned into them makes them simpler, and the wood-burning patterns surround the word to add to its overall beauty.
You can also add a monogram, a family name, or just a simple design. The options are endless, and they make excellent gifts. If it is a set, tie one onto a present as a cute topper. Master the concept of transferring a design onto the wood and choosing the correct tip for the small spaces you will be burning. Add color for a more beautiful ornament.
Fridge Magnet
Fridge magnets add a rustic charm to any kitchen at any time of the year. Make use of mini wooden discs. These magnets are a way to keep your favorite photos, the children’s scribbles, and your shopping list.
Prepare your designs by drawing your wood designs in pencil first or starting with your pyrography tool immediately. What determines your starting point is your level of work.
Use stamps to create designs, and always test your wood with the pyrography tool first. If your discs are coarse, sand them with sanding paper before you begin. Decorate DIY fridge magnets, and when the wooden discs have cooled, they are ready to be converted into magnets. Attach the magnets to the woof using glue.
Wall Art
Wall art is one of the best Christmas presents you can give a friend or family. What makes it possible for woodworkers to make thousands of wall art is easy to make, and it takes a few minutes to finish.
Print your design out on a standard sheet of copy paper and flip the paper over and scribble with the pencil to cover the design. Position the design right side on the wood slice and tape it down to secure it.
Trace over the design with your pencil. That way, you will be transferring it onto the wood slice. Test on a small area before you go too far into the tracing, and start burning it into the wood using the rounded tip.
Keychains
The pricing depends on the base cost of your keychains and your target market. Keychains are customizable and make a great housewarming, Christmas, or birthday gift.
Giving it away as part of a gift wrap makes it valuable. That is why there are many sales from creatives who sell key chains. Making key chains is not much of a hassle and easier if you follow some instructions. Start by making a wood-burned design for the keychain.
Choose a pen-like tip for your wood burner, screw it on and tighten the set screw. Plugin the wood burner and let it warm up. Sketch the design onto a wooden craft circle and burn on the wooden design you sketched. Attach the wooden craft circle to the beaded set. Attach to the keychain clasp. Find out how much you can sell your wood burned keychains for.
Cutting Board
Cutting boards are part of every household. Making them is practical and used simultaneously, making good gifts for anyone. Sketch out a design you want for your cutting board with a pencil.
You can even print a phrase online and trace it onto the board. When your tool is hot, trace over your pencil lines with the wood burner. Heat the stamp for about 30 seconds and press down evenly.
Make sure all the edges burn evenly. Use pliers to remove the hot letter stamp and create a new one. Avoid touching the burning hot stamps.
Growth Chart
Growth charts make good gifts since they pass down the significance of life’s daily events from generation to generation. Family traditions are valuable to some people.
As much as there are multiple choices on Etsy, you cannot run out of ideas. You can focus on vintage, depending on your target market. Start by laying out your boards side by side so that you copy the measurements. Use a ruler and a yardstick to take my measurements.
Make two straight lines that run down the length of the left side of the board parallel to one another. These lines are your guidelines. Start marking each inch on the growth chart following a pattern. Measure to see where to begin the name. Trace the numbers to make a chalk transfer onto the board. Erase pencil lines and apply your stain.
Bookmarker
Bookmarkers are quite easy to make and require a piece of wood that has already been trimmed down to the size and shape you want. Once ready, you can put a personal touch on it in patterns or meaningful designs.
Guitar String Plucker
Are you tired of those old boring guitar string pluckers? You can wood burn some exciting patterns, symbols, and designs into yours. The type of design you go with will depend on your skill level. Be mindful of the space restrictions when getting started. Start with something simple and make it more intricate as you become more confident in your ability.
Conclusion
In summary, When you’re finished, you’ll have a pyrography piece that will envy all your woodworking friends, and you’ll be proud to display it in your home or give it as a gift to someone you love. Let us know if you have other beginner wood-burning projects we can share.

- Grain and Sheen: Teak Oil versus Danish Oil Uncovered - January 10, 2024
- The Cherry on Top: Crafting the Perfect Cutting Board - January 9, 2024
- Polyurethane Water-Based vs Oil-Based: Choosing the Right Finish - January 8, 2024